Use this step-by-step guide to reset your password and get back into your website in no time!
Posted on August 2, 2019
Your WordPress website should to be easy to navigate for visitors. This improves their experience and is an essential step in converting them from visitor to paying customer or client. One of the best ways to help your customers get from page to page is by having a well organized header menu and footer menu.
The header is your menu at the top of your website.

The footer is the menu at the bottom of your website.

As you add pages to your WordPress website, it’s important to update your header and footer navigation menus so your visitors can find your new pages. To help you update the menus on your WordPress website, as well as how to organize your menus and make changes, we’re walking you through each step of the process!
Updating Your Menus on Your WordPress Website
Step One: Log in to Your WordPress Website
Before we dive in, make sure you’re logged in to your website so you can make changes. Already there? Move on to Step Two!
Step Two: Accessing Your Menu Screen
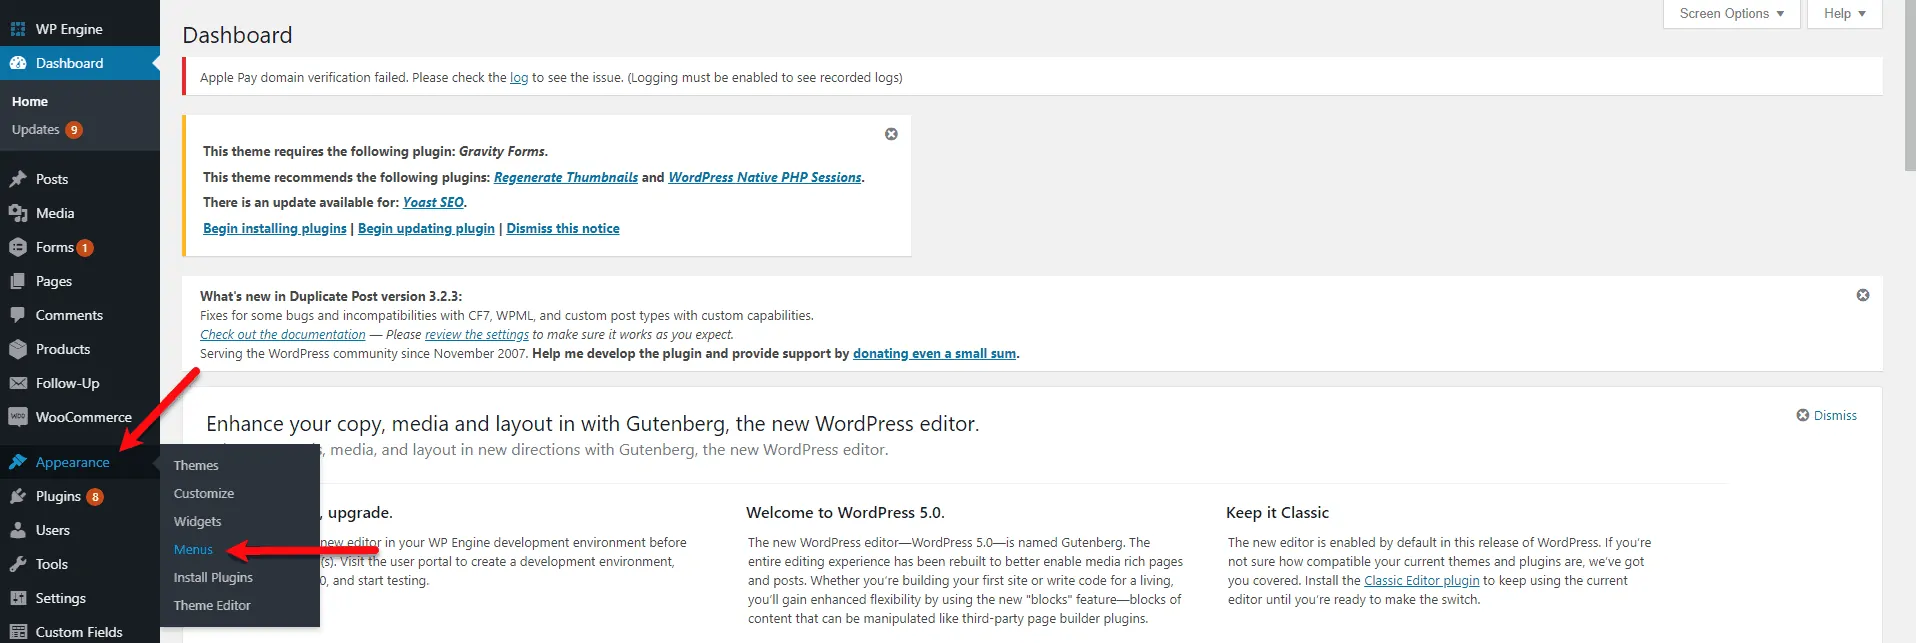
Your header and footer menus are under the Appearance option on your left hand menu. When your mouse goes over Appearance, a sub-menu will pop up with a list of options. Click Menus, and you’ll move on to your next step.
Step Three: Select a Menu to Edit
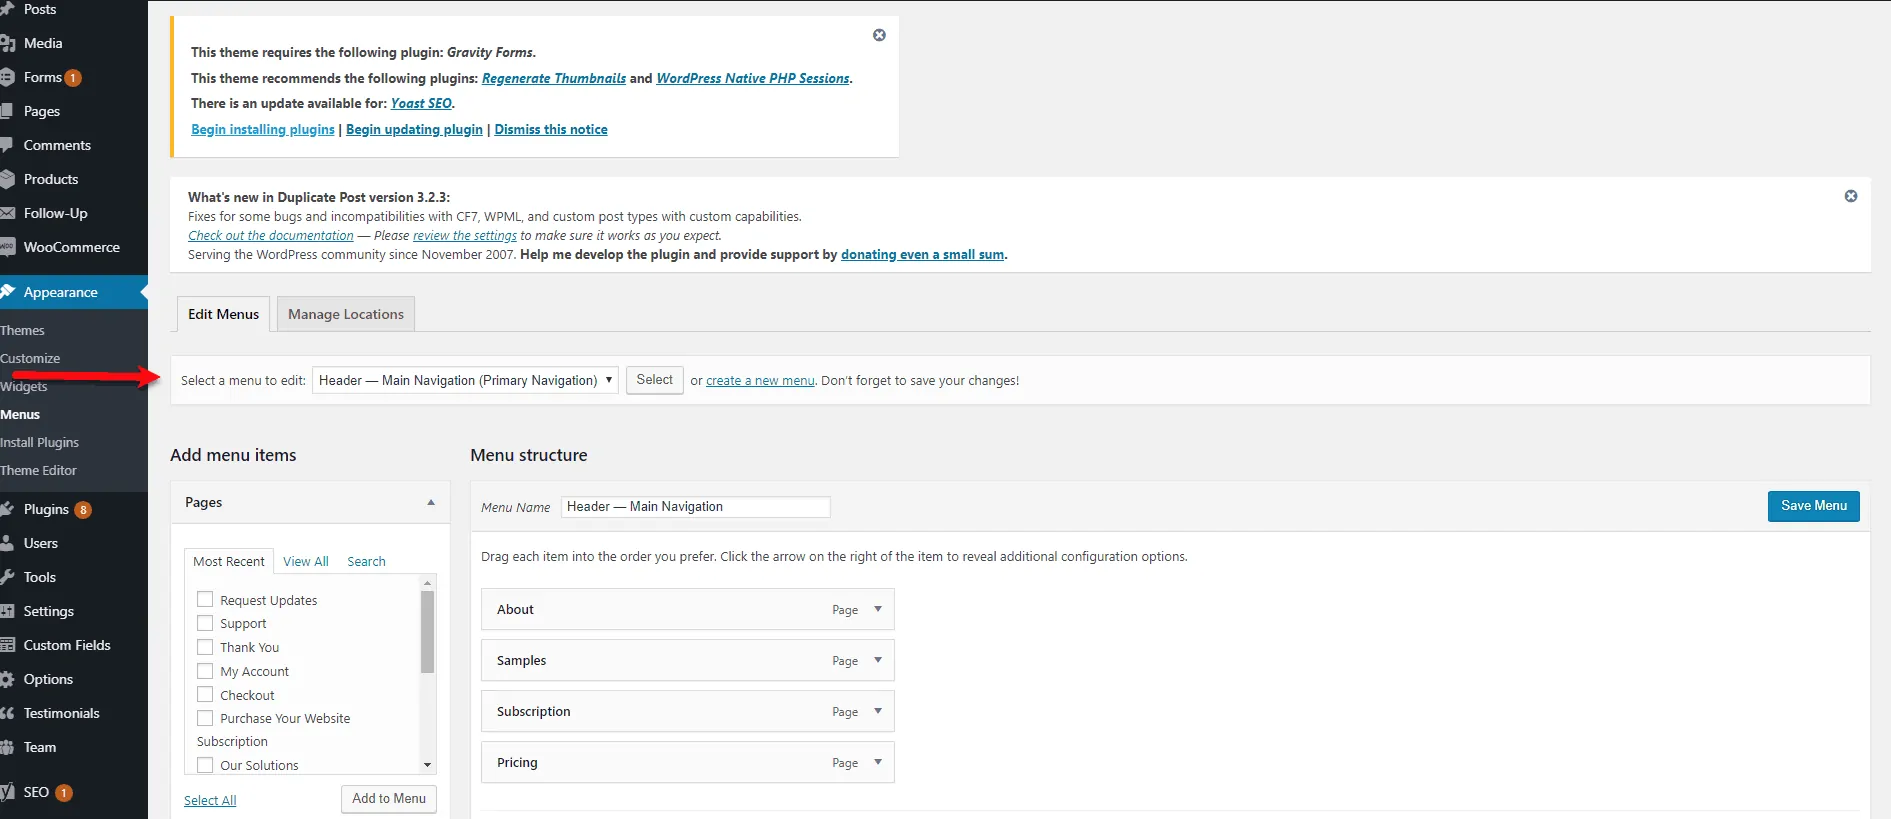
On your menu page, your first step is selecting which menu you want to update – your header or footer menu.
Step Four: Add a Menu Item
You can see in the above picture there are two columns – one is to add menu items, the one on the right is the menu structure of the selected menu. Right now, our main header has four options:
- About
- Samples
- Subscription
- Pricing
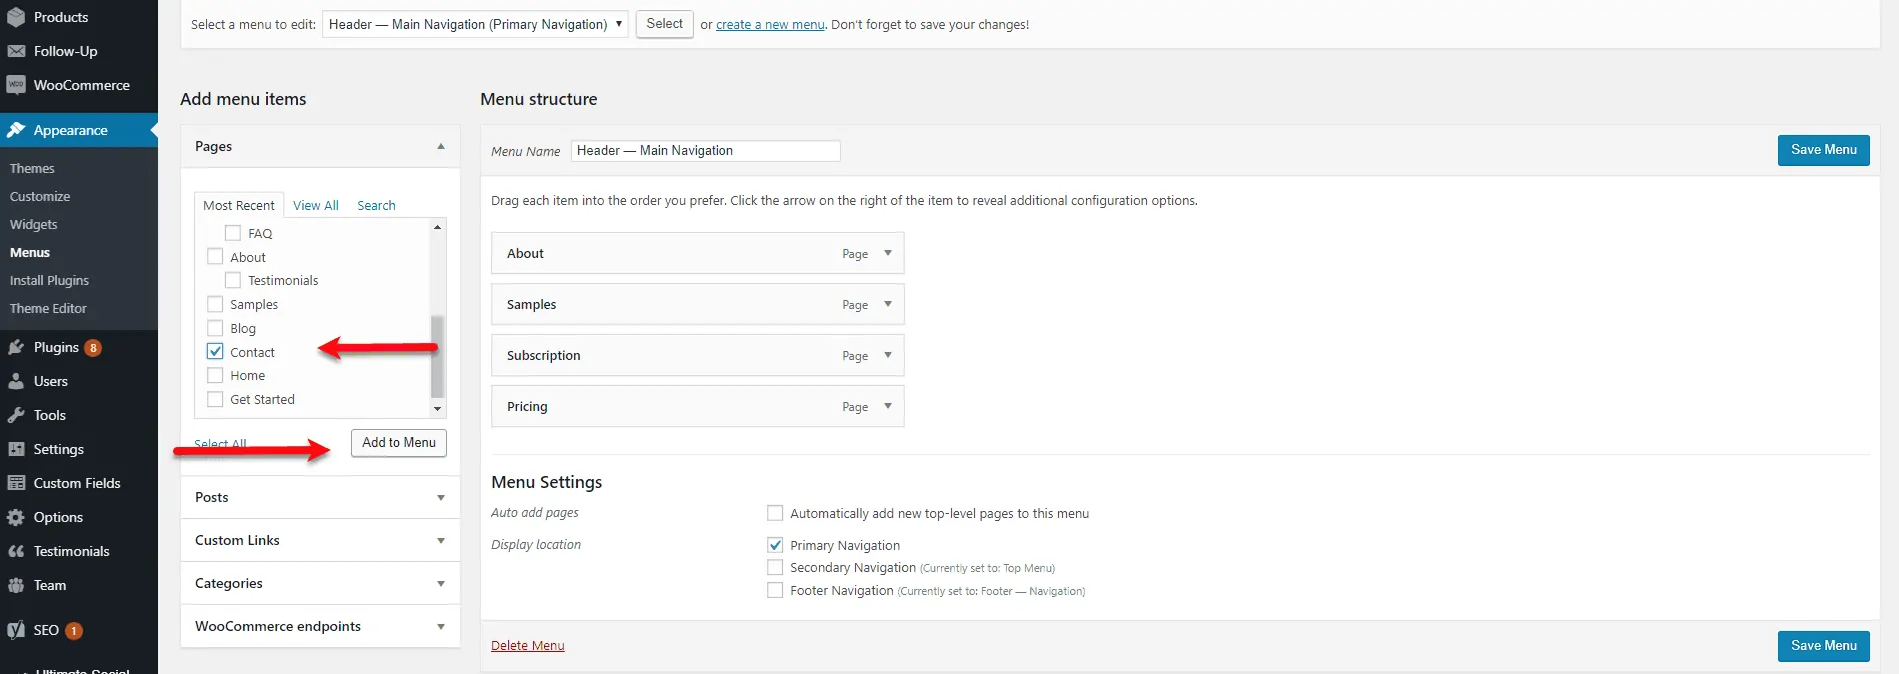
If I want to add a page to the navigation from my existing pages, I could simply click a check box under Add Menu Items and select the Add to Menu button.
For example, let’s say I want to add Contact to the menu.
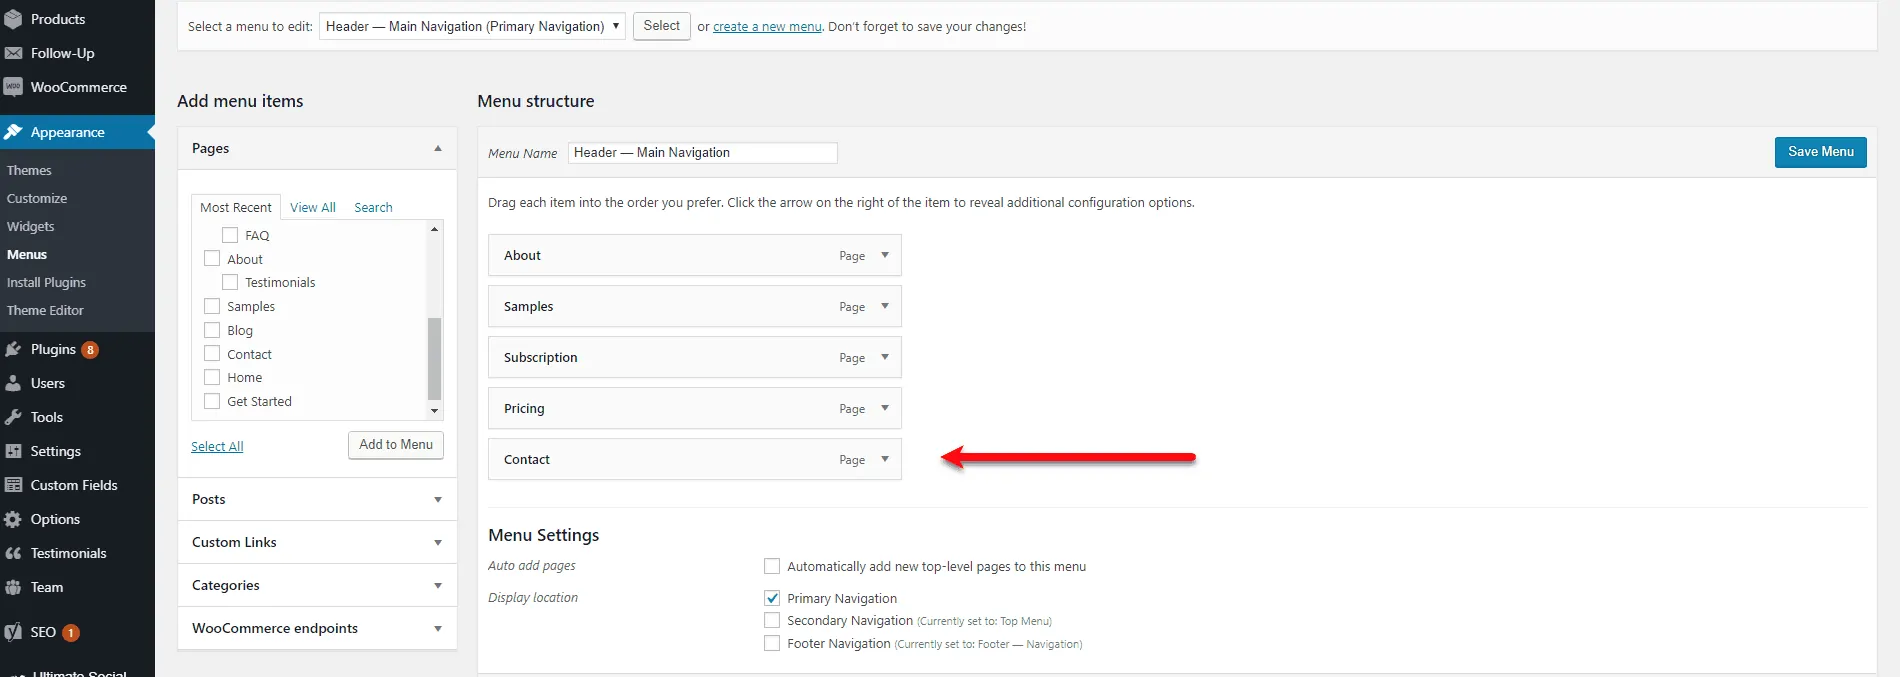
Hit Save and your menu is updated with the new option.
Step Five: Making Edits to Your Menu
If you want to change the location of your new addition, update the link, or even remove it, simply select the arrow on the right, and a drop down menu will come down that lets you make edits or even remove items quickly and easily.
You can do the same thing to your footer menu at the bottom of the page simply by selecting the footer option in Step 3.
How to Organize Menu Items on Your WordPress Website
If you have multiple subpages or subcategories, you may want to have them visible from the main navigation. That’s when “nesting” your menu can improve the organization.
First, you’re going to do the same steps as you did in simply adding pages to the menu – clicking on the boxes and selecting Add.
Then, you’ll want to use your drop down menu to place the page under the option where you will want it to be a drop down option. You’ll see an Up One or Down One option that will let you rearrange your menu.
Once it’s where you want it to be, you can select the Under option, which will make it an option from a drop down menu on your header.
Let’s use the Contact option again except we want it to be a drop down from subscription this time.
Keeping your header and footer menus is a great way to improve peoples’ experience at your website.
Contact WP.digital for a WordPress Website for Your Business
To get a modern, easy to use WordPress website for your business, reach out to the team at WP.digital. Our monthly subscriptions include site hosting, digital marketing, and search engine optimization, and there’s a package for every budget. Fill out our contact form to get started!

