There’s a number of benefits to WordPress website development to help your business succeed.
Posted on July 5, 2019
 One of the greatest benefits to having a WordPress website for your business is that it’s easy for even a beginner to make updates. Whether you want to talk about a new service you offer, regularly post to your blog, or add new pictures, you don’t have to worry about hiring a pro when you can do it all yourself with a few clicks.
One of the first updates you need to learn is how to add a new page to the site our WP.digital team built. Website pages are meant to be timeless, or “evergreen,” – like your About page. Adding new content, such as creating individual pages for locations you serve, highlighting new services or products, or creating pages dedicated to specific brands will improve your visitor experience and your search engine rankings.
To help you get started, we’re going to walk you through how to add a new page, optimize it for search engines, and set up the navigation.
Step One: Login to WordPress
First things first – login to your website! You probably already figured this step out, but at WP.digital, we take “step-by-step” very seriously!
To login to your website, add in /login to your URL (for example www.yourwebsite.com/login), and you’ll be taken to a page that asks for your username and password. We often setup your username to be the same as your email address for ease of use.
Once you’re logged in, you should be looking at your site’s dashboard and see the menu on the left-hand side.
Step Two: Add a New Page
At the menu on the left-hand side, you’ll see a list of options. When you select pages, you’ll see a sub-menu open with a few options. Select ‘Add New,” and a new page will open.

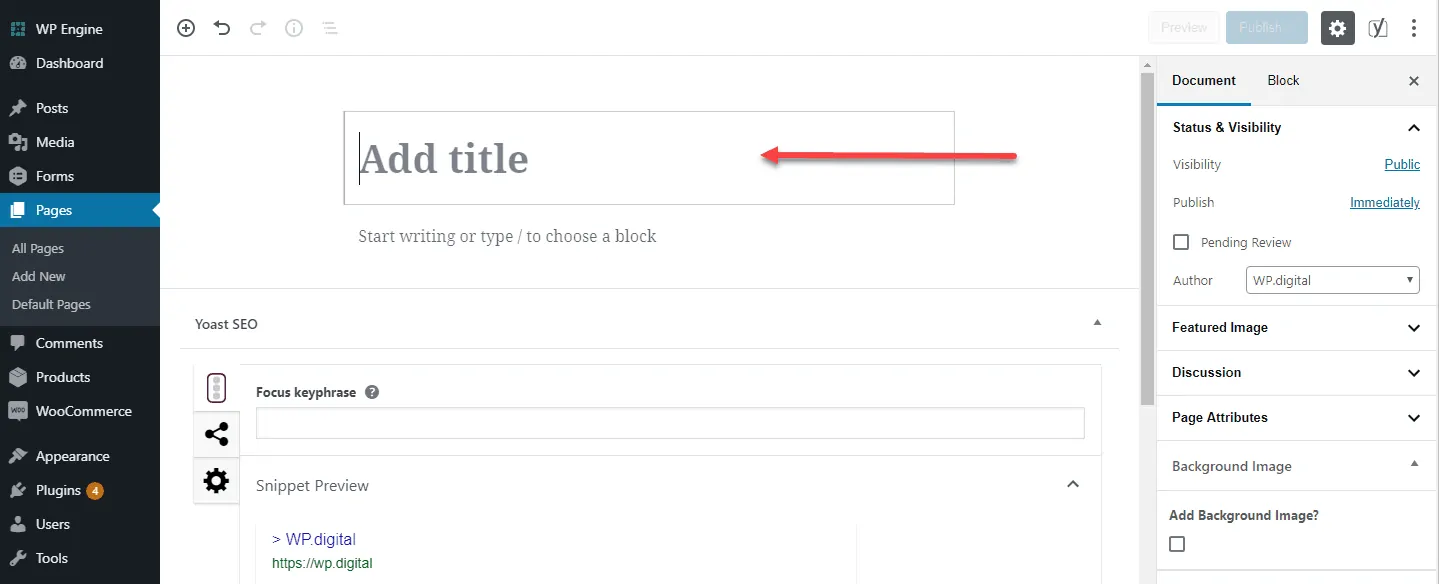
Step Three: Adding Your Title
At the very top of your new page, you’ll add your title. It’s important to be strategic with your title because it has a few roles:
- It can act as your headline, called an H1, which is used in search engine optimization and site navigation.
- The title will also determine the URL for this page on your website (also referred to as the ‘slug’).
For example, if you own an air conditioning business, and your new page is about installing new AC units, your page title could be “New AC Installation,” which will improve your search engine ranking in this category and be a part of the site address: www.yourwebsite.com/new-ac-installation.
Step 4: Adding Content to Your New WordPress Page
As you’ll see in the above screenshot, you can either start typing or choose a block. If you simply want to start adding text, you can, but it limits your customization options.
You may find using blocks to be easier which allows you to divide up your content into specific segments, including paragraphs, images, and headings. You can select the ‘Plus’ sign at the left or the specific icons to the right to add an image, heading, or gallery.
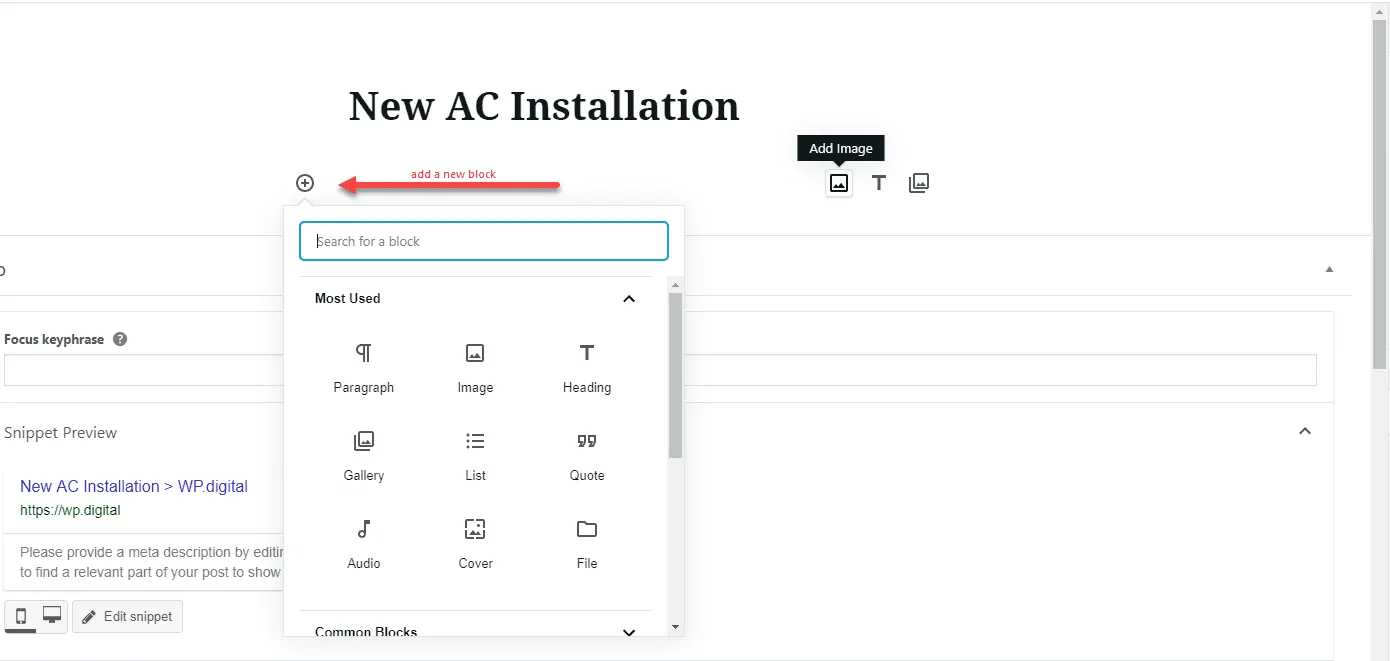
You can add different blocks to separate your new page, adding images and subheadlines (H2s) to break up content and improve your SEO. Also, as you type or add details, make sure you save periodically.
You’ll see there’s blocks already designed for you to do things like add a quote, images, or a whole gallery for your page.
Step 5: Customizing the page for SEO
It’s easy to add an optimized title tag and meta description to your page or post which is absolutely essential to your search engine optimization.
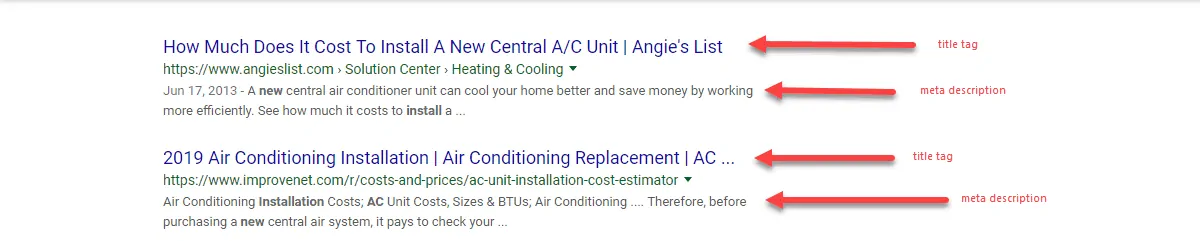
Not sure what a title tag or meta description is? They’re the information that is returned in search engine results – the title tag is the title and the meta description is the brief description underneath the title.
The way we recommend adding SEO to your pages requires your WordPress site to have the plugin “Yoast SEO” installed on your website. We use this plugin on all the websites we make for our WP.digital customers.
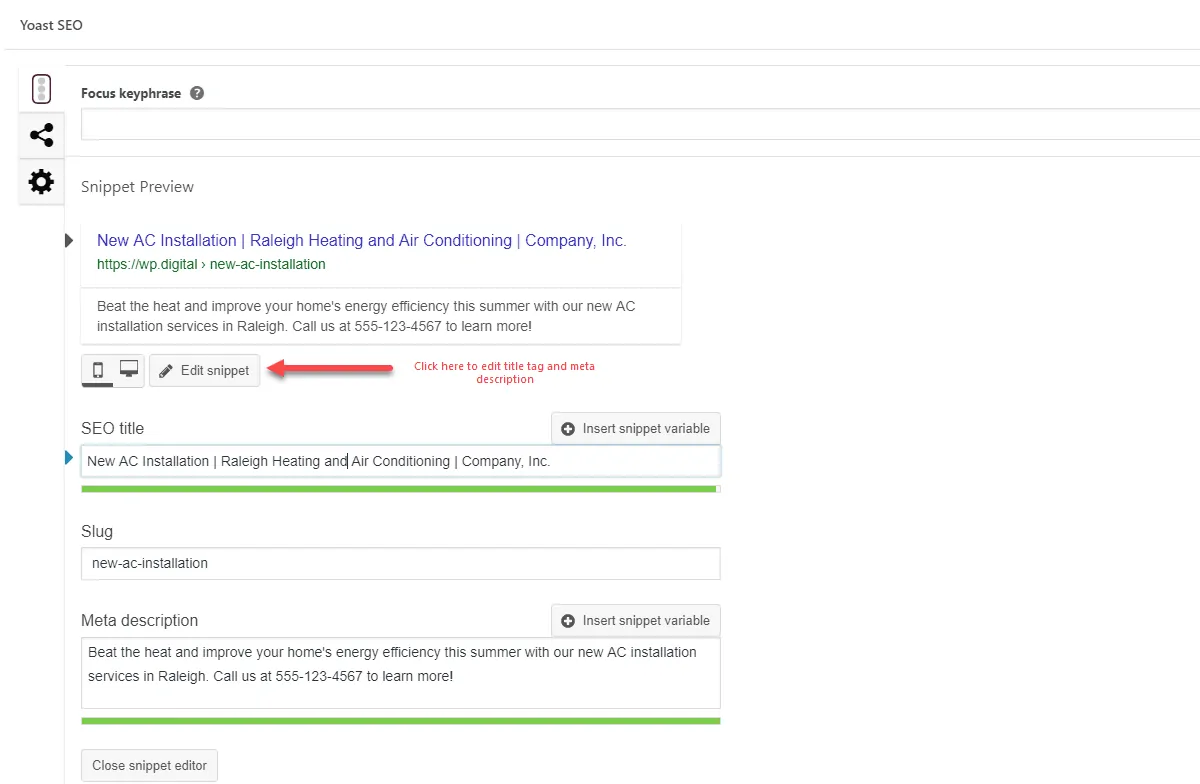
SEO information is down at the very bottom of the page, under the content you’ve written, under the heading “Yoast SEO”. You’ll see a “Snippet Preview” which will show what your page will look like in a search engine result page, and below that, there is an “Edit Snippet” button. When you click to edit the snippet you can edit the SEO title (Title Tag) and the Meta description to include a description of your page that includes the keywords you want your page to rank for.
Because Google and Bing have length limits for their title tags and meta descriptions, your website helps you keep your information within the length parameters. If the bar underneath is red, it’s too long, but if it’s green, it’s a good length that won’t be cut off.
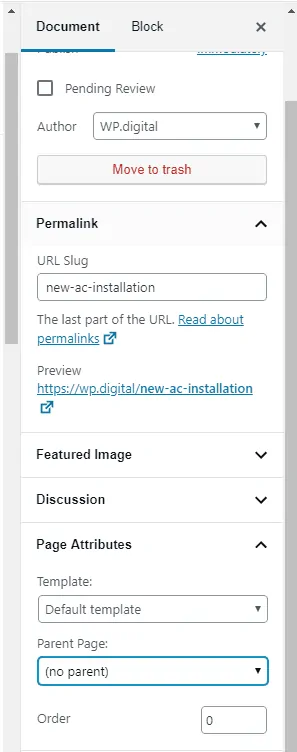
Step 6: Setting Up Your Navigation
The last step is making sure your new page is easy to find. On the right side of your new WordPress page, you can update your url to be more user-friendly if needed, and you can assign it a “parent page.” A page on your site can be a parent or a child (ie: a sub-page) and it helps improve your navigation. If you have a page for services, you could make individual pages for each service providing additional detail and pricing. The Service page would be the parent, and the individual pages would be child pages.
For example, using the New AC Installation example page, this could be a child page of the parent page “air conditioning services.”
Step 7: Publish Your New Page
Read over your content to make sure there are no typos or errors, then select the “Preview” button to see what your page will look like when it’s live on your site. Read through it and make sure it looks the way you want, then select “Publish” in the top right-hand corner.
Congratulations, you just published a page to your WordPress website!
Step 8: Still Need a Hand?
As part of your monthly website subscription, our WP.digital team will write keyword rich content to help drive more traffic to your website. If you are having no luck adding content yourself or don’t have the time, you can submit it to our team to add to your site for you. Just login to your WP.digital account using the Login/My Account link at the top of our website and submit your changes via the Request Updates form.
Contact Us to Build Your Website!
If you want an easy to use website for your small business or organization, WP.digital can help! We offer monthly packages that include the creation of your website, on-going marketing, search engine optimization, site hosting, and more so you can build your business! See our different subscription packages today!
Related Posts
Read More