Make it easy for your customers to reach out to you by learning how to add a contact form in your WordPress website!
Posted on July 19, 2019

Having your blogs divided into categories is also beneficial because it helps your readers easily find information they are looking for. Not sure how to create categories and divide up your blogs? Not to worry! This step-by-step guide will help you organize your blog in no time!
Choosing Categories for Your WordPress Blog
Before we get started with the tech stuff, think about what kind of categories you want to add. Most businesses have a “Company News” category for things like announcing new products, team members, and awards you may have won. Beyond that, consider your business and what you write about, and also be sure to lopk at your blog from a visitor perspective, and think about what kind of categories will help them.
For example, if you have a heating and air conditioning business, your blog categories could include:
- Company News
- Heating
- Air Conditioning
- Maintenance Tips
- Energy Efficiency
On the other hand, if you have a dental practice, your blog categories could include:
- Company News
- Cosmetic Dentistry
- Dental Hygiene
- Pediatric Dentistry
So, before you start adding categories, look at your blog posts and consider some recurring themes that you can turn into categories.
Adding Categories to Your WordPress Website
Now that you know what categories you want to add, let’s get to it!
Step One: Log In to Your WordPress Website
If you’re not already logged in, go ahead and do that first and see your website’s dashboard.
Step Two: Getting to the Categories Section
At the left side of your website’s dashboard, you’ll have your menu. Your blog is actually labelled Posts, and your categories are a sub-section within that. As your mouse hovers over the Posts icon, you will see the categories option. Go ahead and click that to get to that section.
Step Three: Adding a Category
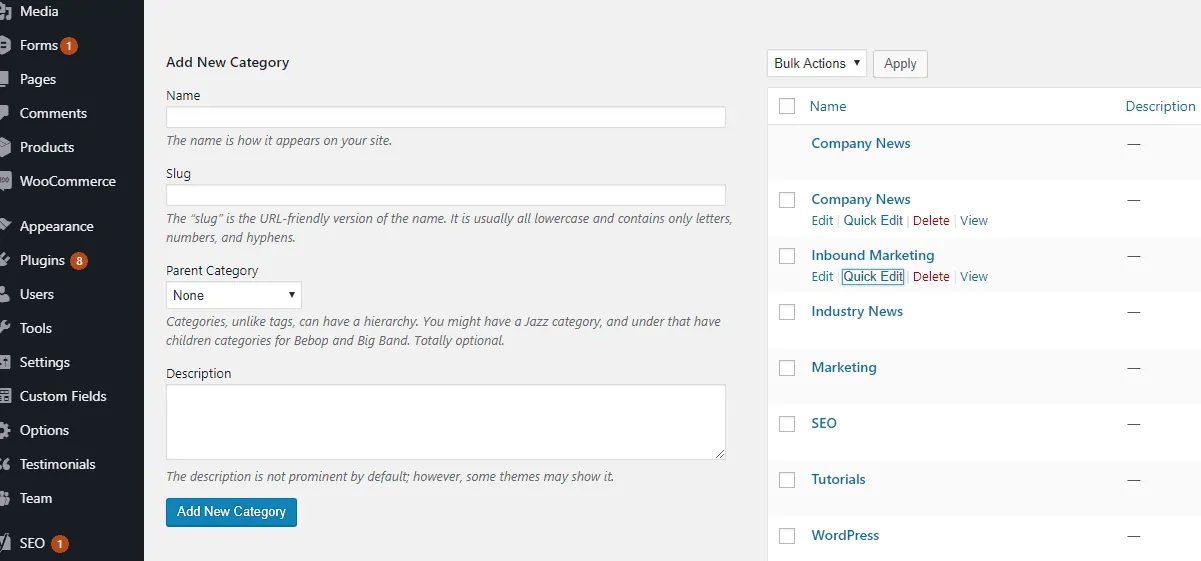
Now that you’re at your category page, it’s time to add a new category. There are four boxes to fill under under the “Add New Category” section on the left hand side of the page:
- Name – How the category will appear on your website. Example: Company News
- Slug – How your category name will appear in the website address. The slug should be all lowercase and not include any spaces. Example: company-news
- Parent Category – This is optional and defaults to None, but if you have hundreds of blog posts and want to add additional organization, you can create sub categories and parent categories. For example, AC maintenance would be a category with Air Conditioning as the parent category
- Description – This category typically gets left empty, and doesn’t display to a website user. If multiple employees manage your blog, you may use this field to leave internal notes, such as “Add news about certifications into this category”
When that is filled out, simply select the blue button labeled Add New Category, and you’re done!
Categorizing Your Blog Posts
Once you have your categories entered, it’s time to go back and update your blog posts to apply the new categories.
You may also want to review how many blog posts are within each category already, and if there’s several categories with just one post consider consolidating your categories or adding more content to those sections.
Step One: Quick Editing Your Category
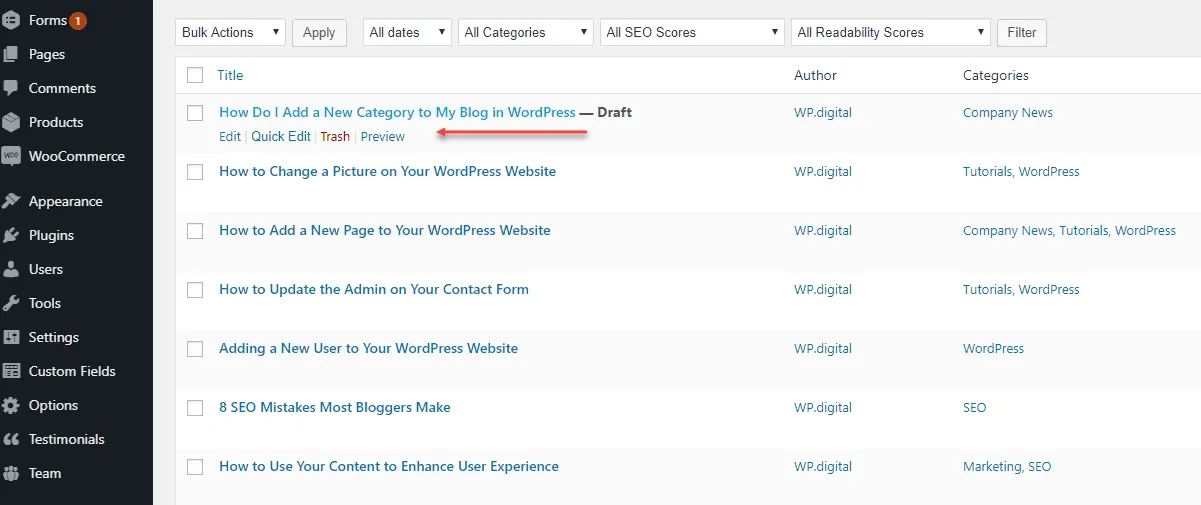
Go to your Posts, and you’ll see a list of your blog pages. As you hover your mouse over a post title, a mini-menu will appear under the title. To just add a category, select Quick-Edit.
Step Two: Assign a Category
When you select Quick Edit, a box will become visible that lets you easily make changes like assigning an author, enabling/disabling comments, and, assigning your categories. You can select as many as you like, as long as they’re relevant. Usually one or two is fine. Then, select the Update box and you’re all set!
Let Us Build Your Optimized WordPress Website!
If you want a website that offers a clean, modern layout, easy navigation, and search engine optimization, we can help! WP.digital offers affordable packages for small businesses that includes a professionally designed WordPress website plus ongoing digital marketing searches and SEO, so you can spend more time building your business!


